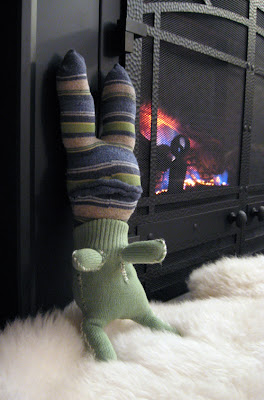
Wednesday, January 30, 2008

Oregon Flag Makeover Project: Back to Basics

Note: I would like to begin by apologizing to all truly obsessive people for implying in yesterday's post that doing the same thing two days in a row qualifies as "obsession."

I've definitely been letting flights of fancy take me where they may with this whole Oregon State Flag redesign, but today it's time to get grounded. I decided a quick review of the official M5K Flag Criteria was in order:

1. A flag needs to look, you know, flaggy. Patterns of bold color with, if you must, simple and iconic symbols. No photos. No intricate drawings or text. (Intricate drawings and text are on the current state flag, of course, but that's a big part of why we are designing a new flag.)
2. Flags are one-sided. Duh.
3. Flags are rectangular. Don't get all Nepal-Ohio on me.
4. Ideally, a flag should be distinctive and immediately recognizable, yet sit comfortably among traditional flag designs.
And, in the interest of simplicity and a very bad childhood experience with the Minnesota state flag, I have added a fifth criteria:

5. The flag should be simple enough to be drawn by any third-grader as part of a social studies project without causing anxiety attacks. (sample of anxiety-inducing flag below)


Of course, I also don't want to limit my creativity too much . . . and the ideas just seem to keep popping up. And at the most inopportune moments.


I also decided to refer back to my two favorite all-time state flags to see what made them so memorable: New Mexico (named as the L&TofM5K winner in the Best Flag, American State, category) and Alaska (also a runner-up in this category).


They are both simple, graphic, iconic. While they lack representations of giant fruit (a serious shortcoming), they really do evoke an emotional response - and I think they capture a little bit of the spirit of the states they represent.

Picking up where I left off yesterday, I started trying to think simple, graphic, iconic. Here's where that got me.


So I tried to go more graphic, focusing on the "fields of color" imperative. I want Blue to represent our rivers and coastline, and Green to represent the lush, mossy tree-ness of the state (ok, at least the Western part of the state . . .) So why not abstract the state itself?

Of course, resorting to the level of symbolism required by "one rain drop for each county" may be a little excessive . . . and I did like the Oregon Trail element . . . perhaps even using the covered wagon icon from the state seal . . . just simplifying it a bit more . . .

I wonder if I could make it even more abstract? Bolder? Maybe eliminate the covered wagon?

Hmmm . . . . is it a good sign or a bad sign when the state flag starts to look suspiciously like a Pink Floyd album cover?


Clearly, it's time for bed.

More Oregon Flag Makeover Madness

I've gotten a bit obsessed. I come home from work. I play Dance Dance Revolution. I think about the Oregon Flag. I blame Michael5000 and his flag makeover contest. Not for the Dance Dance Revolution part. That's clearly not his fault.

Apparently, I didn't quite get the Beaver/Salmon hybrid out of my system yesterday, so here's "the Beamon skiiing - er, snowboarding - on Mt. Hood" as a flag:

I also finally looked up images of Beavers and Salmon and created this yin-yang, forest-river, earth-water flag featuring those state icons in their slightly more natural forms:

I like that the little gold swirl represents the power of our natural resources. Or at least that it could.

Of course, Oregon is much more than Mt. Hood, lush forests, beautiful waterways, cute beavers and slick salmon. There's fruits and nuts!

The state fruit is the pear, and the state nut is the hazelnut. And I have a strong affection for blueberries. So, I began working with those elements, and threw in Mt. Hood for good measure:

Then, I was reminded of a wonderful set of giant fruit and vegetable postcards that I have. Here's one that features pears:

And here's one that features a cucumber:

Now, while cucumbers are not particularly significant to Oregon as a state, this is the culmination of the Oregon Trail - the end of the road for a lot of folks hauling a lot of things in covered wagons. Heck, it's even on the state seal - featured prominently on the current flag:


So, here's what it might look like to bring it all together on a flag:


Of course, it could use a little tweaking. And some blueberries.

Tuesday, January 29, 2008

Just in Case You're Not Feeling Pretty (or Handsome) Today

Go Here. You'll Feel Better, I Promise.

The New Oregon Flag: Initial Attempts

Michael5000 recently posted a flag makeover contest on his blog. As a proud Oregon resident - and as the person who first suggested the ridiculous idea of a flag makeover contest - I feel obliged to enter.

Now, I'm not real keen on competition. Ignoring the fact that I recently sponsored a contest on my own blog, the whole "who's better, who's best" thing makes me a little wacky. But, I do love a challenge. And I love visual brainstorming.

In the spirit of quantity not quality and deferring judgment, I wanted to let you in on how this flag development process is going.

I started by considering some of the elements already on the flag: a beaver, the color blue, the color yellow, the state seal, the easy-to-spot-in-a-line-up words "State of Oregon." I considered elements that are iconic elements of our state: beavers, salmon, Nike, Mt. Hood, wine, trees, eco-stuff, grass farms, tree farms, rain, skiing, rugged coastline, a wide variety of berries.

How to present rain in a flag? Or, how to present the fact that only recent transplants, tourists, and Odd Ducks on Very Rainy Days will actually use umbrellas here in the Beaver State? I began to sketch, using the only paper available to me while eating lunch at Chili's with the Sweetie: the envelope from my PCC W2 form.


Not entirely satisfied, I wanted to see how it looked in color - using blue and green, the colors I primarily associate with my adopted state, so full of moisture and lush, mossy growth:

Sadly, it's not very . . . stately. So, I began to look at iconic animals. The salmon. The beaver. How to get them both on the flag? Representative of our waterways and our forests and their interconnectedness? Hmm . . .

What about a hybrid? The . . . Beamon! A quick sketch of the Beamon skiing (er, sorry, snowboarding) down Mt. Hood was rejected for further development, but the Beamon concept was explored in color. Unfortunately, the artist did not have reference images of either a beaver or a salmon at the time of the drawing:


The Sweetie commented that it looked sort of like a shrimp.

Back to the drawing board.

Sunday, January 27, 2008

DEMO! Stuffed Misfits

Note to Those Watching for a Drawing a Day: I got completely bamboozled by the work The Other Side of My Brain was doing, and lapsed for several days. I like to think that the multiple drawings for this demo cover those days, but then, I also find it hard to get through the day without a good juicy rationalization.

Ladies and Gentlemen, meet Mr. Mojo!

As you can see, he's a bit harried by all the attention - even though he knows the ladies can barely resist his undeniable charms and the paparazzi will chase him. After all, nowhere else in all of sentient fiberdom is there a creature with such green and bushy eyebrows, such a pettable soul patch, or such snugly stuffed pants . . .


Need to make a little Mojo of your own in time for Valentine's Day? I've provided you here with the basic instructions - a great place to start. Or a great place to leap off from into the wild and woolly world of intuitive sock monster creation!

I highly recommend John Murphy's book Stupid Sock Creatures. Mr. Mojo utilizes several techniques from Mr. Murphy in his construction, but is ultimately his own creature. And I encourage you to approach your critter creation with the same sense of adventure! Have nothing but gloves? Try glove monsters - check out these samples from Sister Diane! She's also got a podcast interview with John Murphy, a great thing to listen to while you Frankenstuff. Just have old sweaters and towels? Take a peak at the latest issue of Craft (Volume 06, the one with all the monsters on the cover!) More interested in making dogs, cats, pigs, and elephants? Check out Sock and Glove from Miyako Kanamori for some great ideas on construction . . .

Or, just dive in.

DEMO!

To start, you'll need:

  • A sock
  • A stretchy glove
  • Some stuffing material (you can use polyfil or old fiber scraps)
  • A long needle (I actually like the ones that are labeled for soft sculpture or book arts)
  • Embroidery floss, dental floss, or other heavy-duty polyester thread
  • Scissors
  • Buttons (for eyes)
  • Scraps of old t-shirts, sweaters, or other fiber bits for hair or eyebrows
  • Extra sock and/or glove for clothing items
  • Chopstick (or other skinny tool to aid in stuffing)


Beginning with basic anatomy . . .

Just to get you oriented, and so that the drawings I've done make sense!

First, make about a 4" long cut in the sock, splitting the toe and foot part of the sock into two pieces. Cut down to about the arch of the foot - stop before you reach the heel. If you lay the sock down with the heel up, the toe and foot part of the sock should now look like two ears. Imagine that the heel will become the mouth or snout of the creature.

Cut the thumb and the two middle fingers off the glove.

Turn the sock and the glove inside out. Stitch along the cut in the sock, making two long ears. Then, if you want the creature to have a neck, stitch darts along the sides of the ankle of the sock, below the "snout."

The glove is going to become the legs. Stitch up the hole left by the thumb, and stitch up the hole left by the two missing fingers.

You can use a machine (I prefer a zig-zag stitch) or a long sewing needle threaded with three strands of colorful embroidery floss.

With the sock still inside out, cut two tiny slits (barely big enough to poke a finger through) in the ankle of the sock right under the "neck." This is where the arms will be attached. The cuts do not have to be big, and I don't recommend actually removing any material. The fabric will stretch, so a tiny hole is all you'll need.

Then, take one of the two middle fingers that you cut off of the glove and position it inside the sock so that the hole in the finger lines up with one of the holes in the sock. Now, stitch the edge of the finger to the edge of the slightly stretched hole. Repeat with the other finger. You've got arms!


Now, turn your sock and glove right-side-out again. Using a chopstick or your fingers, stuff stuffing into the ears, head, and arms of the former sock and into the legs of the former glove. Now, you're going to join the two parts of the body. There are a number of ways to approach this.

After some experimenting, for Mr. Mojo I decided to cut two tiny slits just under the cuff of the glove/legs so that the holes lined up with the arms.
I then pulled the little glove body up onto the neck, and poked the arms through the holes in the glove body. This made it so that the cuff of the glove became a kind of turtleneck or collar around the neck of the creature. I then tacked the cuff of the glove to the neck of the creature. I also stitched around the armholes to secure the arms.
Finally, I added the touches that really give the creature personality: button eyes; a mouth formed from the heel of the sock; and bits of felted sweater to make hair, eyebrows, and soul patch. Once I had the soul patch on, he clearly became Mr. Mojo, even though he also had that completely unconfident google-eyed stare. To give him a little more panache, I took the cuff from another sock and created a little pair of pants for Mr. Mojo.

Have fun! And while I don't have any flickr groups up yet, I still love to see pictures of your creations!

Wednesday, January 23, 2008

It's just too cold . . .

and I've been checking out what's happening at everyone else's blog, so the pattern finalization will have to wait. But if you're local to Portland, and into doing cool things with scraps of felted (or "fulled") sweaters, I also heartily recommend the Recycled Sweater Craft classes being held at a library near you - Midland, Belmont, Capitol Hill in the next few weeks alone! Now, I can't swear to this, but I do believe these are being taught by Sister Diane herself!

And for those of you preparing for Valentine's Day, here's a link to some cool pop-up card tutorials from the Princess of Pop-Ups!

creative every day


I'm doing this.
Check it out at:
http://www.creativeeveryday.com/creativeeveryday/
And I forgot to post this!

Tuesday, January 22, 2008

Pattern-Making Process: Stuffed Misfit

I'm going to be hosting a Stuffed Misfit Stitchathon* at CubeSpace here in Portland on Saturday, February 9th from 1-4. Suzi Mayer will be there, too, guiding participants in the creation of hats from felted sweaters. It's a re-use-a-palooza for all the misfit garments, the shrunken sweaters, the mateless gloves, the single socks that you've doubtless removed from your closet in a resolute frenzy of New Year's clutter-clearing. For $5, we supply what you need to make a hat or your very own Stuffed Misfit. Bringing your own shrunken sweater or singleton socks is highly encouraged; I'll have needles, thread, buttons, stuffing, etc. for the Stuffed Misfits.

I'm excited to do this, especially since I didn't have the New Year's Day Stuffed Misfits party I had been loosely planning (see "ennui"). And, since I'm also way behind on doing a January craft project DEMO! (rationalizations: post-holiday ennui and nasty post-ennui energy-zapping head cold) and want to have some kind of original pattern or guide to provide at the Stuffed Misfit Stitchathon and promised to do a drawing a day during January and really just wanted to make a Stuffed Misfit tonight while watching episodes of "The Closer", I thought I'd do a multiple-goal, one project kind of a thing.**

Meet Mr. Misfit in Progress:

Now, I tend to work pretty intuitively. I put stuff together, poke holes, add things on . . . I rarely work from patterns - or if I do, I use them primarily as a starting point. I use books for inspiration and to learn new, very specific techniques.

Mr. Misfit in Progress (he doesn't have a name yet, just an initial sense of maleness) began as an old sock and a cheap-o stretchy glove. Cutting, stitching, and stuffing ensued. There is still stitching - and possibly cutting and stuffing - to be done.

But it doesn't always work in a classroom setting to say, "Ok, just kind of cut things off until it looks right and then stitch it up and stuff it and stitch some more." I try to provide some basic techniques, and then encourage people to run wild. My thinking here is that I'll create this little creature intuitively, but will draw the pattern as I go along so that people have a starting point and can see how I've blended the techniques that I've picked up from different places.

Here's the pattern drawing so far, which I think subconsciously borrows pretty heavily from John Murphy's pattern style, minus the legibility:

Uh-huh. So, it's the first draft. I think it could benefit from some words. It's tough for me to break down what I'm doing into freeze frames, especially when it's still under development. It's a good exercise, though, because it's really forcing me to think about the construction and alternative ways of putting it together . . .

With any luck, I'll get it finished and up on the blog tomorrow. That way, I can post it as a finished drawing, and as a DEMO! and use it in the workshop on February 9th! Multi-tasking - it's all part of my process.

Footnotes:

* "Stuffed Misfit Stitchathon" is not the name under which CubeSpace will be promoting this event, as I just came up with it a few minutes ago. However, it's catchier than my original title (" Make Your Own Stuffed Misfit: Soft Monsters from Stranded Socks and Odd Gloves with Bridget Benton") so I'm going with it.

** Figuring out how to do exactly what you want while still meeting your personal goals and satisfying the obligations, needs and requirements of those within your chosen environment is a very particular application of creative skill, one that is present in abundance in young children, college students, lawyers, and professional mediators. I consider it a critical life skill, though when coupled with self-delusion, lies, and/or statistics (as it too often is in the case of college students and lawyers) it can get pretty ugly.

Monday, January 21, 2008

Quadropus and Sea Pomegranates, II


I seem to be slightly obsessed . . .

Sunday, January 20, 2008

Four-Legged Squid Thingie and Sea Pomegranates


Chalk Pastels and Oil Pastels, cut out and layered . . . things squished around on the scanner a bit.

Saturday, January 19, 2008

In which our heroine fails to flog herself.


Oh gentle reader, I failed to post a drawing yesterday. I was being sick. And lazy. The good news is, I think I have turned the corner, and may in fact be on the road to Wellness. Or at least the pathway to Lesser Sickness, a rather modest suburb full of Thera-flu, strip malls, and phlegm but slightly more energy than the town of Utter Ooginess where I have been residing these last days . . .

Cartoon Caption Contest Winners


It's a tie - here's the two winners:

"Her heart set on dabbling, she spent some quality time with a large dish of ice cream and tried again. It was a good day." from M5K

"All those painting exercises really paid off!" from Leah


Each of these lucky bloggers will receive a handmade magnet and thumbtack set!

Thursday, January 17, 2008

Still Sick: The Still Life

The shape of the cup is all wonky, but then again, so is my head. Can't wait to get back to 100%.

Wednesday, January 16, 2008

The New Food Pyramid


Still sick, and apparently, dreaming of tea parties . . .

Tuesday, January 15, 2008

Foreshadowing?

So, yesterday I talked about being at home in my body . . . and today, I'm sick. Nasty little head cold. Yuck. Still managed to draw this while taking in fluids and watching "Ugly Betty," which is actually a much better show than the premise makes it sound like it would be.

At Home In My Body

I take a lot of supplements. So I decided to draw them - some of them - today. Iron. Vitamin E. Flax Seed Oil. Part of this is about finding creative and artistic inspiration in everyday objects - their shapes and colors. Creating compositions out of thin air.

And some of this is about home. A lot of my artwork and writing during the 90's dealt with body image. Now, a lot of my work deals with ideas of home . . . what makes a home and what it is to feel at home or to come home. Some of this is about place, some of it about people.

And some of it is about self. I have gone through long periods of time in my life when I haven't felt at home in my body, or really felt at home anywhere. With anyone. The last few years have been about coming home - getting more comfortable in my own body and my own life.

It's a work in process, but it feels pretty good.

Too bad there's not a supplement for it.

Sunday, January 13, 2008

Absract Drawings


Saturday, January 12, 2008

The Quest Test


Recently, my friend and encaustic painter Linda published a blog post reflecting on the year past as well as her goals for the new year . . . including a quest to find the right balance in her life. Part of this was how to know which opportunities to say "yes" to and which ones to say "no" to. She came up with a five question "quest test" to help her evaluate opportunities.

Last year was a year of tremendous transition for me - I bought a house and completed my Master's Degree in Creativity. I committed myself to making my art a priority, and slowly shifting my business to reflect this priority. I know it's going to take time: time to find the best way of offering classes and training in creative thinking and art-making, time to figure out how to present myself and my classes, time to get into a rhythm of making and showing art. And in reading Linda's five questions, I realized that my quest was more about development, and my questions needed to reflect it. So, here are my four questions:

Does it help me develop as an artist?
Does it help me develop my business?
Does it help me develop my personal self?
Does it help me develop my relationships, including my relationship with the Divine?

And the Drawing a Day in January project on the blog seems to really fit - it gets me exercising an underused artistic muscle (I talk about my relationship to drawing here), keeps me engaged in making art and continuing to unwrap the creative process (which is the heart of my business), gets me looking at myself and other things with new eyes (and what else is personal development?), and helps me stay engaged with you folks - and since artmaking is my spiritual practice, it keeps me in touch there, too.

(I won't go into exactly how the Caption Contest fits, but I feel pretty good about that too - and dang, there are some great suggestions so far!!)

(A note about today's drawing: a semi-blind contour drawing of the Sweetie as he snoozles on the couch. Semi-blind because I let myself look each time I switched colors, and the few times I lifted the oil pastel off the page. )

Friday, January 11, 2008

Studio Meme: Essentials and Influences

Dayna started this one, inspired by Alphabetica (which I just ordered) and Gretchin carried it forward: Michael5000 responded in her comments, and now, I'm going to put in my two cents worth. My top ten art studio essentials and my ten major influences . . . in no particular order:

Note: this is tough for someone who works in encaustic, acrylic paint, watercolor, mixed media collage, printmaking and fiber, as well as making jewelry, so I started by looking at what always ends up out of the studio and in the living room because I need it to work on some little project while I watch TV. I also considered what I pack with me or pick up when I travel, and want to be able to make some art along the way.

It also goes without saying that a Refreshing Beverage of Choice (coffee with soy milk in the morning, diet coke or water with Emergen-C in the afternoon, and herbal detox tea in the evening), a Laptop with high-speed internet connection (for Googling, ordering fresh supplies, and downloading episodes of Project Runway) and Public Radio are essentials - no matter whether I'm in the studio, the office, the kitchen, or the car. Ok, I don't really Google while driving. At least not yet. Hello, voice-activated get-it-anywhere internet access.


Studio Essentials:

1. Black Sharpie
2. Exacto Knife and/or sharp scissors
3. Flat and Round medium paintbrushes
4. Gel Medium and/or Mod Podge
5. E6000 and/or Goop glue
6. Big flat surfaces to work on, including a cutting mat
7. Needle and embroidery floss
8. Big surfaces to embellish (paper, fiber or wood)
9. Golden Acrylic Paint or other water-based paints
10. Scrap fabric and scrap paper


Influences: (This includes just about anything I see, but most especially these things)

1. Egon Schiele
2. Eric Booth, The Everyday Work of Art
3. Textiles of all sorts (quilts, ikat, kimono, batik, weaving, embroidery, etc.)
4. Joseph Cornell
5. Traditional devotional and spiritual art (icons, mandalas, shrines, thankas, etc.)
6. fruits and vegetables
7. Costumes and the Fashion Industry, including glossy fashion magazines and Project Runway
8. The Xerox Machine
9. Travel (Garden of the Gods*, the Rockies, Nepal, Bali, Thailand, Route 66, and on and on)
10. Stewart Cubley and Process Painting

and because this one goes to 11 . . .
11. Outsider Art (see Raw Vision), feminism, the DIY Movement (see ReadyMade), word nerds, and other Geeks Who Make Things With Meaning

Tag - you're it. Shu-Ju? Ann?

*Garden of the Gods is a park in Colorado Springs, CO very close to where I went to college . . . I remember seeing those pinkish red and red-orange rocks, all covered with lichens in shades of gray-green and bright-green, contrasting so intensely and looking so beautiful . . . I'd always loved color, but I remember very consciously thinking about how those colors worked in nature and how I could get them to work in a painting.

Cartoon Caption Contest


As I was doing this little doodle, I thought of a multitude of possible captions . . . but none of them sung out and said "I'm the one!" So, inspired by the New Yorker's Caption Contest, I'm soliciting help from my clever, creative, and humorously endowed readers (rumor is, I have at least FOUR of you now, and at least one of you has made my no-bake cookie recipe! Groovy!). If you have any ideas for a caption, post them and make sure I've got your e-mail. If you see an idea you like in the comments section, let me know.

And next weekend, I'll pick the best one using a top secret geek formula, and will award the winner a Very Special Prize. And yes, "Very Special Prize" is code for "I have no idea what it is yet." But it will be an object, it will be cool, and I will mail it to you. How's that for tempting?! So come on, show me what you've got . . .

Thursday, January 10, 2008

Tired, with music

Very long day today - but finished with a flourish, seeing "Sing-Along Grease" at Cinema 21. The words to all the songs appear on the screen, and they hand out little goody bags with bubbles (for the beauty school dropout song) and sunglasses and bubblegum cigarettes, and you get to sing out loud . . . very fun, but after that and work and a nasty headache, I'm pretty wiped out and really don't want to mess with the scanner.

so here's my drawing today:

(\\)
(/////)
(| - - |)
! @@ !
\ * /
=====
=====


It's a self-portrait. My hair is in a bun, I'm wearing dangly earrings and a turtleneck sweater, and I'm blowing you all a kiss! And, scarily enough, I revised it several times before I was satisfied with it. I am very delighted with the frazzled looking "at" eyes.

Wednesday, January 9, 2008

My First Gocco

This evening after work, I took the Intro Gocco Class at the IPRC - taught by the marvelous Gretchin of Scarlet Star Studios! A Gocco is a Japanese home silk screening tool that allows you to make small (4"x6") prints of any line or high-contrast artwork you can photocopy. Of course, now that I'm hooked, the rumor is that Gocco is no longer being distributed in the U.S. *sigh* I've had one sitting in the garage, and as a former silkscreener, it's been on my "I really want to learn to do this" list. Tonight, I decided to start my Gocco print adventure by drawing little bat images, using the bat finger puppet that was in my Christmas stocking as a model:


(The little "flash, squish" in the upper corner of the drawing were my notes on cool words that Gretchin used while describing the Gocco printing process - "flashing" to burn the screen, and "squishing" to ink and print the screen. Now, of course, I want to make shirts that say: "scribble, flash, squish - Gocco!")

And here is my first print - the drawing moved on the bed when I flashed the screen, so half his little wing got cut off - but other than that, I'm pretty happy with the detail! And, you can print on fabric. I'm thinking it would be a lot of fun to combine this with the foam prints - the delicate detail on top of the rich texture would be really lovely . . .

And there's an advanced Gocco class coming up at the IPRC on January 26th - taught by Shu-Ju Wang, your go-to Gocco gal. I won't be able to make this one, but I'm on it for next time! If you don't live in Portland and you're curious about the Gocco (pronounced "go co," rhymes with "loco") here's a great - if old - blog entry on it at getcrafty.com from Nancy Flynn.

Tuesday, January 8, 2008

Boots!

Monday, January 7, 2008

Self-Portrait: Pastels


Pulled out the pastels, and played - lots of fun with the smearing and the color and exaggerating the dark circles . . .

Sunday, January 6, 2008

Wonderful Wheat-Free Weekend: A Creative Life Primer


On a wing of inspiration from CraftyPod, I just signed up for Creative Every Day 2008. Not that I necessarily needed another commitment (save perhaps of the psychiatric type) for the coming year - particularly after my Blogolutions. But something about Creative Every Day's philosophy resonated with me - and seemed so in alignment with my own ideas about creativity, my desire to live a creative life, and my mission to support the creative spark in others, that well, I couldn't resist being a joiner and signing up.

Besides, I clearly don't have enough blogs that I'm reading on a semi-daily basis.

Yup, the ennui is gone, the fog has lifted, the gloom has run its course. I'm back to my usual over-stimulated self, delighted and inspired by everything from a mote of dust to these mind-blowing birds by Ann Wood. Or this daft and dear bird with a thread nest over at WhileSheNaps. Or Tamara Mogendorff's nifty little birds with houses. Or food.

I just finished reading Gluten-Free Girl by Shauna James Ahern. Her foodie blog, a delight no matter what you eat, is here. And guess what? I found the book totally inspiring!

Like the vast majority of women born in the latter 20th century, I have a love/hate relationship with my body and its essential building blocks, FOOD and EXERCISE. I was a bookwormish kid in a family that leaned towards the large and struggled with weight. My early childhood is filled with memories of my mother's homemade chocolate meringue pie and grilled cheese sandwiches; my middle years dominated by microwave pastries eaten during Dukes of Hazard and chewy European breads; my later teen years a blur of Italian food and family conversations about restaurants, food, and diets.

In addition to a medley of body-image madness, I started getting chronic headaches as a teenager. Over the next 10-15 years, I tried everything to get rid of them: wearing glasses (even though I have 20/20 vision), regular massage, vitamins, hot/cold compress, steam, chiropractic, doing yoga, drinking more water. Finally, after years of snorting behind my hand at people who claimed to have "food sensitivities," I got tested. And then I stopped eating wheat. And then my headaches decreased. DRAMATICALLY.

On the one hand, it was a relief. Finally! I knew, at least in part, what was causing the headaches! I could stop most of them! On the other hand, it was one more way to make food the enemy. Food - which I loved, with whom I was having an illicit tastebud affair - could not only make me fat, it could make me sick. Now, I was "depriving" myself not only of "fattening food" because I had an unrealistic idea of what my body should look like and a fear of obesity, I was "depriving" myself of some of my favorite foods: pastas, quick breads, cookies, pastries. Foods I had only recently learned to cook.

A few of you may have followed along this little rant only to wonder, "Ok, but isn't this a blog about creativity? Hello?"

And that's exactly my point! Stay with me a few moments longer, oh gentle reader . . .

My attitude toward food at that point in my life - and frankly, for most of my life - has been antithetical to a creative life. Creativity is about making connections across boundaries, seeing possibilities within constraints. It requires not only cognitive skills - like having and evaluating ideas - it requires affective skills. Emotional skills like being open to novelty, curious, playful, or tolerant of ambiguity*. You know, all those things that allow us to be excited by and engaged in life rather than totally terrified by it all day long?

And Shauna, when she got her diagnoses - not just as "wheat sensitive" but "gluten intolerant" meaning that grains like wheat, barley, spelt, rye and their derivatives were off her list because her body produced gut-destroying antibodies in their presence - what did she do? She got totally excited about all the foods she could eat!

With curiosity and open-minded abandon, she ran headlong into the possibilities. She experimented. She tried new foods. She created, within the constraints her body required for health and pushing the edges, just as a painter creates within the constraints of the canvas and the pigments, always pushing them to do more.

I sometimes feel that if I could consistently cultivate this attitude towards food, I could unlock the whole secret of a creative life.

Baby steps. So, today, I made biscuits. Without wheat.


*for those of you who are curious about the cognitive/thinking skills theory of creativity (and the complementary affective/feeling skills theory), Creative Leadership: Skills That Drive Change by Dr.'s Puccio, Murdock, and Mance is a great primer (though spendy, as it's a textbook)

ShareThis